Three ways to finish decorating these cotton batting soft-serve ice cream cones. Left, strawberry and vanilla swirl. Center, toffee crunch. Right, mint and vanilla with candy coated chocolate chunks.
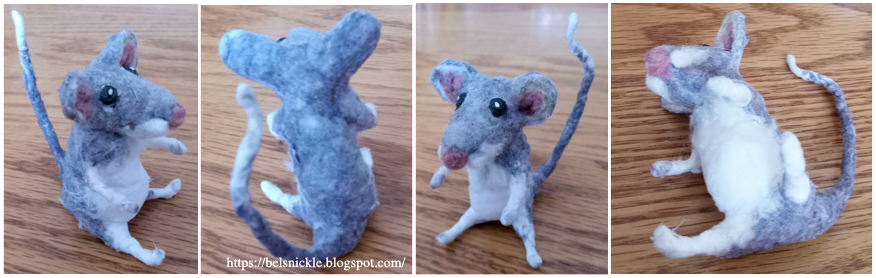
What the cotton batting cones look like before painting.
These soft-serve ice cream cones are perfect for a tree decked out in candy, ice-cream and baked goods! Kids will enjoy finishing them with all kinds of craft materials too: seed beads, glitter, trims, paints etc...
Supply List:
recycled egg carton (cardboard)
cotton balls
masking tape
white school glue
transparent glitter
acrylic paints
hooks for hanging
brown paper bags
Step-by-Step Instructions:
I cut apart quite a few cardboard egg cartons while making these ornaments. Inside of each egg carton there are four sections that are shaped like cones. Cut these out and tape two together so that the shape you will be working with looks like a long tube, tapering at both ends.
Mask all of the surfaces before layering the lower half with glue and brown paper bag scraps.
Leave the upper cone for the layering of cotton batting and glue. Work the cotton in a spiral shape resembling soft-serve ice cream. This is the same spiral technique that I used for the cotton batting ice sickles here.
I then painted the ice cream cones different colors. Some are pink and white, others chocolate and still more left white with glitter and sparkling balls.
I painted the sugar cones last using a very small paint brush to sketch the diamond pattern.
Mint and chocolate soft serve sugar cones.
Caramel, vanilla and strawberry ice creams
Nut, candy or berry combined with syrup.
See More Sweet Things To Display On and Under the Tree:
Turning plastic apples into decorative candy apples for the Christmas tree is an easy way to reuse something for a better purpose. After all, who uses plastic apples to decorate with anymore? But in a Christmas display these look good enough to actually eat!
Supply List:
cotton balls
white school glue
permanent ink marker
plastic apples
masking tape
copper/caramel colored acrylic paints
Elmer's gold glitter glue
wire for the hangers
Step-by-Step Instructions:
Use the permanent ink pen to draw a wavy line around the apple, marking the place where the caramel is molded over the surface.
Mask off every thing above the line.
Glue and bind with masking tape the wire attaching it to the plastic apple stem.
Now unravel your cotton balls and layer white glue and cotton on top of the masked areas, so that these will give the faux melted caramel dimension.
Layer the batting over the stem as well and twist it onto the wire. Let dry.
Paint the faux caramel with acrylic copper paint or something comparable.
Squeeze Elmer's gold glitter glue on the painted surface to add a little extra bling.
Shape the wire into a hook.
Left, plastic apple. Next, ink pen marks for the caramel. Center, masking taped surface. Right, after the cotton batting was layered over the tape with glue, I let it dry and then painted it.
Layers of cotton batting and glue are used to shape the caramel.
See more ways to transform fake fruit into something special:
The land of Palestine is divided from north to south by a central range of mountains which runs up through this narrow strip of country like a spinal column. About five miles south of Jerusalem a ridge or spur shoots off from the central range towards the east. On the terminal bluff of this ridge lies the town of Bethlehem. On the west it is shut in by the plateau, and on the east the ridge breaks steeply down into the plain. Vineyards cover the hillsides with green and purple, and wheat fields wave in the valleys. In the distant east, across the Dead Sea, the mountains of Moab are penciled in dark blue against the sky. At the present time, 1919, the town has eight thousand inhabitants. Its flat-roofed houses are well built and its narrow streets are clean. It is a busy place, its chief industry being the manufacture of souvenirs of olive wood which are sold throughout the Christian world. Its principal church is the Church of the Nativity, which is built over a cave that is one of the most sacred and memorable spots on the globe. It is believed that this cave is the place where Christ was born, and a silver star inlaid in the stone floor is intended to mark the exact spot. It was then used as the stable of the adjoining inn, and in its stone manger the infant Jesus may have been laid. At the time of this event Bethlehem was a mere village of a few hundred people. It might have been thought that Jerusalem, the historic metropolis and proud capital of the country, the chosen city of God and seat of the temple and center of worship, a city beautiful for situation, magnificent in its architecture, sacred in its associations and world-wide and splendid in its fame, should have been honored with this supreme event in the history of the Jews. But an ancient prophet, while noting its comparative insignificance, had yet put his finger on this tiny point on the map and pronounced upon it a blessing that caused it to blaze out like a star amidst its rural hills. "But thou, Bethlehem Ephratah, though thou be little among the thousands of Judah, yet out of thee shall he come forth unto me that is to be ruler in Israel; whose goings forth have been from of old, from everlasting." And so proud Jerusalem was passed by, and this supreme honor was bestowed upon the humble village. Great men, as a rule, are not born in cities. They come up out of obscure villages and hidden nooks and corners. They originate closer to nature than city-born men and seem to spring from the very soil. The most noted birthplace in Scotland is that of Burns: it is a humble cottage with a thatched roof and a stable in one end of it. The most celebrated birth- place in England is that of Shakespeare, and again it is a plain cottage in a country village. Lincoln was born in a log hut in the wilds of Kentucky, Mohammed was the son of a camel driver, and Confucius the son of a soldier. The city must go to the country for its masters, and the world draws its best blood and brains from the farm. It was in accordance with this principle that the Savior of the world should be born, not in a city and palace, but in a country village, and that his first bed should be, not a downy couch, but a slab of stone. by James Henry Snowden
Though surcharged with such tremendous meaning, carrying a heavier burden of news than was ever before committed to human language, yet the simplicity with which the story is told is one of the literary marvels of the gospels. This event has inspired poets and painters and has been embroidered and illuminated with an immense amount of ornamentation. Genius has poured its splendors upon it and tried to give us some worthy conception of the scene. But the evangelists had no such purpose or thought, and their story is told with that charming artlessness that is perfect art. They were not men of genius, but plain men, mostly tax collectors and fishermen untrained in the schools, with no thought of skill or literary art. Yet all the stylists and artists of the world stand in wonder before their unconscious effort and supreme achievement. No attempt at rhetoric disfigures their record, not a word is written for effect, but the simple facts are allowed to tell their own eloquent and marvelous tale. The inspired writers mixed no imagination with their verities, for they had no other thought than to tell the plain truth; and this gives us confidence in the trustworthiness of their narrative. These men did not follow cunningly devised fables when they made known unto us the power and coming of our Lord Jesus Christ, for they were eye-witnesses of his glory. by James Henry Snowden
The term Magi was anciently used generally throughout the East, to distinguish philosophers, and especially astronomers. Pliny and Ptolemy mention Aribi as synonymous with Magi; and it was the opinion of many learned in the first ages of Christianity, that the Magi who presented offerings to the infant Savior in Matthew 2:1 came from Southern Arabia for it is certain that "gold, frankincense and myrrh,'' were productions of that country. They were philosophers among whom the best parts of the reformed Magian system, which was extensively diffused, were probably preserved. They were pious men, also, who had some acqaintance, it may be, with the Hebrew prophecies, and were favored themselves, with divine revelations. They are to be regarded as members of the old patriarchal church, never quite extinguished among the heathen; and they had the special honor to present the homage of the Gentile world to the infant Savior. - Hend. Buck; Watson
A Byzantine mosaic of the three Magi depicted in Persian clothing.
The backside and frontside of our Popsicle Alpine Cottage. It has been painted and the glitter added.
To make an alpine Christmas cottage out of Popsicle sticks you will need the following supplies: tacky craft glue, twine for the hanger, acrylic paints in white, red, brown and green, a small bottle brush wreath, two cotton balls, transparent glitter, 10 small Popsicle sticks, 21 Larger Popsicle sticks, masking tape, hot glue and white school glue. Clamps to hold wooden craft sticks in place while these dry come in handy for this project!
The front and back of the Christmas cottage before the painting and other details are added. See cross-bracing craft sticks on the back; the beginning Popsicle sticks are first glued on top of these for strength and accurate position.
Step-by-Step Instructions:
Line up 10 large Popsicles side by side and then use masking tape to hold them together right down the center of the group.
Now glue two more Popsicles, spaced two inches apart perpendicular to the rest, to hold the bulk of the sticks in place permanently. Let these dry in place. Remove the tape once everything has dried.
Build a roof in the same way using five Popsicle sticks. Clip the ends on each side to form a pitched roof.
Glue on two supporting sticks on top of the right and left sides to form an inverted "V'' shape that reinforces the pitched roof line. See photos above for correct placement. Let these sticks dry.
Now glue the roof and front of the alpine cottage together, overlapping just one Popsicle at the ends. The cross-bracing on the walls of the cottage should face to the back of the ornament. The cross-bracing along the roof-line should be facing the front of the cottage.
Now glue on the large window and shutters to match the scaling you see in the detailed photos above.
Draw, with a soft pencil, a wavy line across the roof cross-bracing, in order to mark the place where you will be gluing the ''snowdrift'' across the roof.
Unravel a cotton ball and glue this directly to those wooden sticks carefully in order to keep the snow in place.
Cover the entire pitch of the roof on the backside of the ornament and layer unravelled cotton batting on top of it. Let all of the cotton dry while the cottage is standing on it's bottom edge.
Apply more glue and transparent glitter if you like.
Next, paint the wooden surfaces to match those shown in the photo above.
For our window, I cut window mullions in a diamond shaped pattern from white paper and glued these to the painted surface for more detail.
Hot glue on twine for hanging to the backside of the ornament.
Hot glue on a white, bottle-brush wreath to the front above the window.
Glue on more glitter snow inside the nooks and crannies of the window pains and shutters too!
The story starts with the place and time of the Savior's birth. Jesus was born in Bethlehem of Judea, in the days of Herod the king. There are many myths and legends floating through the world that are often beautiful and useful, but they hang like gorgeous clouds in the air and are ever changing their shape and place. They are growths of the imagination and lack historic roots and reality. They are chary of names and dates and hide their origin in far-away mists. However powerfully and pathetically they may reflect the needs and hopes of the human heart, they are unsubstantial as dreams and afford no foundation on which to build our faith. Heathen religions are generally woven of this legendary stuff. The Greek and Roman divinities were all mythical. But the scientific spirit has swept these imaginary deities out of our sky and rendered belief in them impossible. Our religion must be rooted in reality and cannot live in clouds, however beautifully they may be colored. We refuse hospitality to anything but fact. Give us names and dates, is our demand. The Bible responds to this requirement. Christianity is an historical religion. The gospel narrative begins with no such in- definite statement as "Once upon a time'' but it starts in Bethlehem of Judea. The town is there and we can stand on the very spot where Jesus was born. The narrative places the time of his birth in the days of Herod the king. History knows Herod; there is nothing mythical about this monster of iniquity. These statements are facts that no keenest critic or scholarly unbeliever can plausibly dispute. So the gospel sets its record in the rigid frame of history; it roots its origin down in the rocky ledge of Judea. Christ was not born in a dream, but in Bethlehem. We are not, then, building our faith on a myth, but on immovable matters of fact. This thing was not done in a corner, but in the broad day, and it is not afraid of the geographer's map and the historian's pen. The Christmas story is not another beautiful legend in the world's gallery of myths, but is sober and solid reality; its story is history. Our religion is truth, and we will worship at no other altar. by James Henry Snowden
Description of Coloring Page: angel ornament, inside a Christmas tree, bell, garland, star, candle, decorate a Christmas tree
"Our Christmas tree glows with trim Bright and shining on every limb. But the nicest ornament of all Is an angel, so dainty and small.''
Don't forget to drag the png. or jpg into a Word Document and enlarge the image
as much as possible before printing it folks. If you have a question
about this coloring page, just type into the comment box located
directly below this post and I'll try to get back to you as soon as I
can.
How to cut a Christmas tissue paper garland:
Take a strip of white, red or green paper 3 inches wide and any desired length. Fold paper vertically into thirds. Alternate slits as in Figure 1. shown above.
Description of Coloring Page: childartwork, Christmas Creche, camels, sheep, shepherds and wise men, hammer and nails, backdrop, props, scene, table
"Shepherds Star and Wise Men too,
All appear in our Christmas view.
At school, each does his part
To make this scene a work of art.''
Don't forget to drag the png. or jpg into a Word Document and enlarge the image
as much as possible before printing it folks. If you have a question
about this coloring page, just type into the comment box located
directly below this post and I'll try to get back to you as soon as I
can.
3 Steps To Make The Stars and Straws Garland:
Trace and cut stars from colored construction paper, using many colors, if possible. You may use the pattern above for this.
Cut drinking straws 1 1/2 inches long.
Thread a needle and string one large star after 12 straw segments; then repeat this pattern over and over until you have a long garland to wrap about your Christmas tree.
His birth was a wonderful fulfillment of prophecy. The Jews had cherished the hope of the promised Messiah for thousands of years. Through all their national vicissitudes, enslavement in Egypt, wanderings in the wilderness, establishment and growth in the promised land, internal division and external captivity in Babylon, restoration, and final subjection to the Romans, this hope burned on the horizon of their future as a fixed star. It was this that ever led them on and held them together and made it impossible to break or subdue their spirit. This was the dawn that filled all their dark and bitter days with the rosy glow of hope. Yet the Messiah came not, and as the centuries slowly rolled along they must have grown weary and at times have doubted. Skeptics scoffed, "Where is the sign of his coming?' But the great heart of the nation remained true to its trust, while prophets caught glimpses of the coming glory and white-headed, trembling old saints prayed that they might live a little longer and not die before he came. Perhaps this hope was never at a lower ebb than when the Roman power was ruthlessly grinding the nation down into the dust. But suddenly at this darkest hour a blinding light burnt through the floor of heaven and shepherds ran about announcing that the Messiah was born! Who can imagine the surprise, the wonder, the overwhelming amazement this news created? How many were eager to go to Bethlehem and see this thing which had come to pass! And when it was found to be true, they rejoiced with exceeding great joy and old men blessed God and said, "Lord, now lettest thou thy servants depart in peace." Luke 2:29-32 Yet why should they have wondered at God's faithfulness in keeping his promise, as though he could ever have forgotten it or failed to bring it to pass? Why should we ever wonder at the faithfulness of God? Doubtless in some degree because of our human infirmity. Our sense of unity with God and trust in him have been weakened by sin until we are ready to doubt him as though he were one of ourselves. His promises also are so far-reaching and great, splendid and blessed, they so far surpass our thoughts of wisdom and mercy, that, even though they have been repeated to us until we are familiar with them, when they are fulfilled we wonder at the faithfulness that will bring so great things to pass. by James Henry Snowden
Near events may have remote causes. The river that sweeps by us cannot be explained without going far back to hidden springs in distant hills. The huge wave that breaks upon the ocean shore may have had its origin in a submarine upheaval five thousand miles away.
A wide circle of causes converged towards this birth; all the spokes of the ancient world ran into this hub. When Abraham started west as an emigrant out of Babylonia, "not knowing whither he went," (Hebrews 11:8) he was unconsciously traveling towards Bethlehem. Jewish history for centuries headed towards this culmination; this was the matchless blossom that bloomed out of all that growth from Abraham to Joseph and Mary. Priest and prophet, tabernacle and temple, gorgeous ritual and streaming altar, sacrifice and psalm, kingdom and captivity, triumph and tragedy were all so many roots to this tree. These were the education and discipline of the chosen people, preparing them as soil out of which the Messiah could spring. The great ideas of the unity and sovereignty, spirituality and righteousness of God, the sinfulness of sin and the need of an atonement were in flaming picture language emblazoned before the people and burnt into their conscience. Christ would do nothing until these ideas were rooted in the world.
Pagan achievements, also, "the glory-that was Greece and the grandeur that was Rome," were roots to this same tree of preparation for the coming of Christ, though they knew it not. Greece with all the glories of its philosophy and art showed that the world never could be saved by it's own wisdom; and all the laws and legions of Rome were equally impotent to lift it out of the ditch of sin. Neither a brilliant brain nor a mailed fist can save a lost world. Yet both Greece and Rome made positive contributions to the preparation for Christ. Greece fashioned a marvelous instrument for propagating the gospel in its highly flexible and expressive language, and Rome reduced the world to order and hushed it into peace and thus turned it into a vast amphitheater in which the gospel could be heard. Greece also contributed philosophy that threw light on the gospel, and Rome gave it a rich inheritance of law.
God thus set this event in a mighty framework of preparation. He got the world ready for Christ before he brought Christ to the world. He was in no haste and took plenty of time before he struck the great hour. The harvest must lie out in the showers and sunshine for weeks and months before it can ripen into golden wheat, and the meteor must shoot through millions of invisible miles for one brief flash of splendor. The centuries seemed slow-footed during that long and dreary stretch from Abraham to Mary, "but when the fullness of time was come, God sent forth his Son." (Galatians 4:4-7) by James Henry Snowden
The finished poinsettia quilled ornament covered with glitter.
This is a quilling project for little ones with small hands and limited hand coordination. It looks terrific when the poinsettia is finally painted and covered with green and red glitter!
When adults quill ornaments, much finer cut papers are used and it takes much longer for original quill work to be completed.
Because the project can take several days to complete, I find it best to use the tacky craft glue. This will speed up the drying time and limit frustrations for younger students. Set the flower over a heating duct or in some other warm area of the home to encourage rapid dry time.
Supply List:
several recycled toilet paper rolls
craft tacky glue
green and red glitter
green and red paint
small, delicate paint brush
white school glue
twine or wire for hanging
Step-by-Step Instructions:
Cut six petal shapes approximately 1/2 inches wide of approximately the same size from the first paper tube.
Pinch these at opposite ends and glue each one to the other, using tacky craft glue, at one end only to form a poinsettia shaped blossom. (see photo below)
Now cut down the next paper tube to half it lengthwise.
Cut out 1/2 inch paper curls to shape circular cardboard shapes to fill the inside of the poinsettia. I fit 12 of these shapes for the insides of my poinsettia as seen below and above. However, filling the blossom may be done any number of ways by the same methods.
Paint all of the dry poinsettia with red paint.
After the flower is done, cut one or two petal in by the identical process for the leaf segments of the poinsettia. Tuck these between the flower petals and paint them green.
Using a small, delicate paint brush, work your way around the flower covering surfaces with white school glue and glitter. It is easiest to due the leafy shapes with green first. Let these selections dry entirely first before moving on to the red flower. This will prevent the glitters from sticking in the wrong places and mixing together.
Loop a twine or wire hanger through any place inside the ornament cavities.
Left, is paper toilet roll, clean and recycled. Center it the first stage of the instructions described above. The outside shape of a poinsettia flower. Right, you can see how I filled this in with additional cardboard circles. Alternatively you could fill in one of these with large to smaller oval shapes.
This nostalgic print would look charming on a fireplace mantel or hanging on a tree. You could also tuck it inside of a Christmas card for a special family member or friend. Apply a bit of glue and transparent glitter to it's surface to make the snowy surface come to life...
Gibson's Movie Post Cards "An all around Merry Christmas'' restored for fun and merry making.
To make the knitter's bauble, for hanging on a Christmas tree, you will need the following supplies: a Styrofoam ball, enough yarn to cover the ball, white school glue, two skewers, two beads to fit perfectly on the ends of each skewer and wire for the hanger. Apply white school in modest amount to the surface of the Styrofoam ball while you wrap it to cover with the yarn. Too much glue makes a mess that will ruin this project if you are not cautious. While you are waiting for parts of the wrap to dry a bit, cut the skewers down to 5 1/2 inches if you are making a medium sized bauble. Cut these pretend knitting needles longer or shorter depending upon the scale and size of the ball you are wrapping for the ornament. Glue small beads to each flat end of your knitting needles. Wrap the knitting needles in a cross position while working the yarn around these, just as they would appear if doing it with real needles inside of a ball of yarn. Shape a hanger from wire, dab the end of it with glue and then push it deep inside the Styrofoam ball to hang.
Left, see the yarn covered bauble hanging. Right, here to see the hook detail.
The key to making these knitting balls for the tree is to limit the amount of yarn used to cover the bauble's surface so that the ornament won't get to heavy for the branches of a Christmas tree. And also, if you are a frugal knitter, you may only want to use the amount of yarn necessary for these festive trims so that there will be enough left-over for the next textile project!
To make winter skies like ours for your Christmas tree you will need the following craft supplies: metal snaps (sewing notions), twine, masking tape, white school glue, hot glue gun and glue, acrylic paints, figurative tissue paper, wooden skewers, fine sandpaper and large Popsicle sticks or tongue depressors.
Above, see two different methods for decorating your skis and ski poles.
Step-by-Step Instructions:
Cut the skewers to 4 1/4 inch lengths.
Clip off the curved ends of the Popsicle sticks at the bottom of each ski only. With white school glue stick one on top of the other in an 'X' shape. Let dry.
Cross the two ski poles, one on top of the other. Glue these together securing them in an 'X' formation with a bit of twine or masking tape. This shape will follow the shape of the crossed Popsicle stick skies.
You can twist the twine at the top of each ski pole to make the handles and/or use folded masking tape for handles to later paint.
Glue silver sewing snaps to the bottom of each ski pole using the hot glue gun and hot glue.
Either paint or decoupage the skis in the colors of your choice. Above the photograph shows both possibilities.
Once the skis have been decorated, hot glue the ski poles on top of the Popsicle skis.
Tape a wire hanger to the backside of your wooden skis and cover this with paint or additional decoupaged tissue.
Left, is the sled from underneath. Right is the sled from above.
This Flexible Flyer is a child's sled intended for recreation only. But, when it is only six inches long like these, you can only hang it on a tree...
Samuel Allen patented his Flexible Flyer in 1889. While his factory normally produced farm equipment, the sleds gave his workers something to build during slower times of the year, during the winter months.
Make sure the wooden Popsicle sticks are clean and freshly sanded. This will insure that the tacky glue will adhere the pieces.
You will need masking tape to hold the sticks in place as these dry. Stick the first two Popsicle sticks in the center of a length of tape very close together with just a slight bit of separation. Then stick two more, one on either side of the center two, after the tips have been sliced off at an angle using a hack saw or utility scissors.
Now turn the group over and cut down the sticks for the underside of the sled to fit. These will be glued down on their edges. Use more masking tape to hold these in place while they dry.
Once the sleds are dry and firmly glued in place, remove the masking tape.
Paint the sled a traditional red or green for the Christmas tree.
Tie on a piece of twine for hanging the ornament.
If this sled is too simple for your tastes, hot glue a few Christmas garnishes and presents to the top of the sled.
For some of our visitors, snow topped mountains, lodges and skying are all apart of winter fun. This year I will be posting more ornaments with sports themes. The first few being related to the mountains: the people who live there, the sports they practice and the landscapes in winter.
Supply List:
heavy paper or thin flexible cardboard
decorative yarn (colorful for the mountain)
hot glue gun and hot glue
white school glue or tacky white glue
masking tape
thin flexible wire for the hanger
five or six cotton balls
white or cream yarn (for the snow toped mountain)
felt to compliment the color of the yarn for the bottom of the mountain.
Step-by-Step Instructions:
Cut out the circle from cardboard that has at least a five inch diameter across it's center.
Cut this circle exactly in half.
Bent the half circle shape around it's self to form a cone. Tape the cone in place.
Cut off the tip of the cone to thread a fine wire up and through. On the inside of the cone bunch up the wire just a bit to sink it into a bit of hot glue. This will hold the wire in place.
Wrap the outside of the cone first, starting from the bottom, with the colorful yarn. Squeeze the tacky craft glue around the cone as you do this. Try to keep the wrap as clean as possible.
Stop a 1/2 inch from the top, peak of the cone mountain.
Continue on using white or cream yarn to represent the snow-caped mountain.
Wrap the remaining wire with cotton batting and shape this into a fancy hook.
After the yarn applications have dried, stuff the interior with cotton balls to help the mountain ornaments keep their shape.
Next using the tacky white glue, spread some generously onto a scrap piece of cardboard and press the mountain's bottom opening on top. Let dry before trimming off the excess cardboard.
Cover the bottom of the mountain using scrap felt and glue to finish the ornament.
Left, cut and wrap a cone from cardboard. Center wrap the yarn mountain. Right, a cotton batting snow cap in this version of the ornament.
Below is an illustrated model of how a log cabin, made from paper, may be cut and fashioned in such a way as to store it flat until needed. It is "a cabin home'' with pull strings and presto! the walls come together. Make free standing trees too and craft a small frontier display to assemble beneath a table-top tree if you like...
Other types of homes may be made following the above working plan.
Learn to handcraft a few little mice for a Christmas tree or for play in a mouse house if you prefer. Children love them no matter what color they are or from what materials you choose to make them with. Every mouse has it's own character and you will enjoy dressing them for the holidays as well.
Shred white cotton balls into fluff and layer this with white glue onto the chenille stems, winding the cotton around the stems. Once the cotton batting and glue is evenly distributed, you can roll the wire between the palms of your hands to adhere it to the chenille better. This process will also 'even out' the application.
Now cut and bend the cotton coated wires into basic mouse armature. See and copy the photos below.
Don't forget to twist the mice tails to the armature from behind.
Now layer cotton batting and white glue on top of the armature in order to 'flesh out' the delicate little mouse bodies.
Glue on large round ears and eyeballs made from Sculpey oven-bake clay.
Once you have fleshed out the bodies to the most believable shapes, dab on white glue and dryer lint to color the white fur further.
After the mice have dried completely next to a heating duct, ideally, paint the eyes and thread a needle with white or transparent thread to weave in and out of the mice cheeks. Clip the whiskers to a shorter length at the end.
This little wooden flat of a squirrel is painted in a very abstract way using a dry brush and sponge technique. You could just as easily choose to paint him by the same methods using grey colors instead.
Supply List:
orange, white, red, yellow acrylic paints
tiny acorn and cap
hot glue gun and hot glue
a wooden squirrel flat, unpainted
soft sponge, tiny brush, medium sized brush all three for application of paint
Step-by-Step Instructions:
Sponge the entire front face of the wooden squirrel one color; a rusty brown is good, if you're squirrel is to be a red squirrel.
While the paint is still wet, dry brush in some lighter oranges, reds and yellows.
After the surface is dry, paint eye and nose details in black.
Go back with a liquid of soft, pale whites for the high-lighted areas.
Hot glue on the real acorn and cap just beneath your squirrel's paws.
Use the tip of a pin to add a high-light in the critter's eye.
Mod Podge the finished surface once you are satisfied with the results.
A vintage girl shaped using chenille stems and felt scraps.
You can assemble this adorable little Christmas Miss using felt and tacky fabric glue. I believe she dates back to the 1960s or 70s. Make a whole series in any color to match your tree trimmings...
Supply List:
two sheets of craft felt, one navy and the other teal
gold braid rick-rack
olive green velvet ribbon
velvet pink flowers
tacky glue for fabric
white lace
gold embossed paper trim
a wooden bead for the head
acrylic paints
two chenille stems
gold twine for the hanger
Step-by-Step Instructions:
Cut two lengths from the chenille stems: one five inches long and the second, seven inches long.
Cut and roll felt rectangles to cover both the arm stem, five inches and the leg stem, seven inches. Glue down the edges using tacky fabric glue. let dry
Twist the dry arm and leg stems together at the center of both. Pull the longer legs down and the shorter arms lengths above the legs.
Pinch the arm lengths in the center up approximately 1/2 inch up and glue inside the hole of the wooden bead for the doll's head.
Paint this wooden ''head'' bead using acrylics. Paint the hair, and facial features using a tiny brush for details. let dry.
Now cut a half circle for the doll's dress from felt. The half circle should measure approximately ten inches across it's length.
Next cut two more circles from the felt. The first smaller circle should be 1 3/4 inches in diameter to shape the doll's hat. The second circle should measure 2 inches in diameter to shape the doll's collar.
Decorate the right side of the largest felt half circle prior to attaching it with tacky fabric glue just below the wire arm stems. Use notions like: lace, rick-rack and other gold trims seen in the photo above.
Attach the felt skirt beneath the wire arms using tacky fabric glue, also gluing the shorter sides of the felt skirt together.
Loop a hanger for the doll from twine and thread it up through the backside of the circular hat.
Glue this to the wooden head with the knot underneath and the loop for hanging above. This hat should be allowed to dry before proceeding to the next step.
For the collar, cut a slit through the felt only to the center of the circle. Then twist the collar beneath the wooden chin of the doll, covering the arms and skirt waist and glue it in place.
Tie a green velvet ribbon above the collar.
Now glue flower trims to the hat and additional felt boots and gloves if you like!
The following gift tags have been altered and colorized by kathy grimm for our visitors to print, cut and stick onto gifts for the holiday season! Do not resale or distribute these from any other website they are the freeware property of our belsnickle blog.
Christmas gift tags in red and green for all your wrapping needs this season, 2024.