Monday, August 14, 2017

DIY Jacob's Ladder Toy for Christmas

       This is a very old and ingenious puzzle and an amusing toy. It is very simply made. A number of blocks of wood must be cut, 4"x 2 1/2" x 3/8". Any number may be used, but not less than seven - twelve for the most traditional type.
       Round the edges of the blocks and make them smooth with sand-paper, as in Fig 488. if the toy is to be given to a toddler. Cut strips of tape about 1/4" wide and long enough to go over the rounded ends of the blocks, a, b b, etc., in Fig. 488. There are three tapes to each block. Nail and glue tape a to the center of upper end of block A; it is then brought over and downward under the middle of the lower end of block B and fastened.
       Tapes b b are now fastened to the opposite end of A about 1/4" from the end on either side, and are then brought round the opposite end of B, as shown in the diagram. The center tape c is fastened to B and then brought down underneath to the center of the opposite end of C. The tapes must be arranged like this throughout the whole set of blocks. 
       Fig. 489. shows how the blocks are held when they are all complete. Top block A must be turned so as to bring the second block to the same level. The top of this block then falls, and it appears to pass rapidly down first on one side and then on the other, until it reaches the bottom. This is only what seems to happen. What really happens is that the second block becomes reversed and falls back again, in its former position. This makes it come level with the third block, which at once falls over on the fourth, and so on to the end of the ladder. A very illusive effect is thus produced. The blocks might be colored with some bright enamel paint, contrasting colors on opposite sides.

Jacob's Ladder Toys from Victorian Era

Sunday, July 9, 2017

An Uncle Sam Jumping-Jack for Your Patriotic Tree

This Uncle Sam paper doll was designed
by George Piper in 1920.
   I've restored this 1920 Uncle Sam Jumping-Jack by George Piper for your all American, patriotic Christmas tree. You will need some tiny brass brads, scissors and string to assemble him after you have printed out this paper doll.
   Once he is assembled, use a hot glue gun to adhere a tiny bottle brush wreath or tree between his hands. 
   If you want your Christmas scrap to look "older" simply print it out onto yellowish-tan or beige paper.

More of Uncle Sam for Christmas Decorating:
      Did you know that there are 38 total other countries that have red, white and blue colors in their national flags? Patriotic Christmas trees aren't only for Americans; countries like: Australia, Cuba, France, Haiti, Norway, Russia, Taiwan, and even the United Kingdom all have the red, white and blue as their very own national colors!

Saturday, July 8, 2017

Red, White and Blue Christmas

A vintage American shield graphic.
       This graphic comes from a very old catalogue that is about 100 years old. I've cleaned it up of course.  I hope that those of you who have red, white and blue Christmas themes on your trees this year will enjoy including it with a few tinsel trims among the the branches of a dusty green pine.
       There are many other countries around the world that also have red, white and blue colors to represent their flag. So this new category here at my Christmas blog may inspire their holiday projects during December as well.

More eye candy about an antique, patriotic Christmas:
Two suggestions for temporary pendent trims of a chandelier making alternative use of the shield graphics.
 These vintage suggestions come from a vintage Dennison company catalogue.
A Vintage Canadian/British shield graphic.

"This is our Christmas Tribute to military men and military families.
 Thanks for your sacrifices so we can have the freedoms we do."
These girls have lovely voices; check them out. Watch out for those
BB guns however, "You'll shoot your eye out!"

Tuesday, June 20, 2017

Owlets in a sycamore tree ornament...

The completed baby owls stare out from their cozy candy
container. These are adorable on a woodland inspired
Christmas tree or a cotton batting themed Christmas tree.
        This woodland inspired ornament craft includes both natural materials and traditional cotton batting applications. It is made from a hollow cardboard tube so that Santa's elves may insert small toys or candy inside of it on Christmas morning.
       In order to complete this ornament with success, I am presuming that visitors here have been working with cotton batting for a while. If you are new to my blog and have never tried crafting with these materials I will include links to simpler cotton batting projects where I describe the techniques in greater detail within the text of the step-by-step directions.

Supply List:
  • cardboard tube 
  • white school glue
  • masking tape
  • acrylic paints: yellow, white and black
  • tiny paint brush
  • cotton balls
  • dryer lint
  • wire for hanging
  • extra cardboard
  • one walnut, cut in half
  • black thread
  • scissors
Step-by-Step Directions:
This tube was not masked properly, but I have
included the picture for you to see how the
walnuts look when glued in place.
  1. Select a cardboard tube and cut it to the size you prefer. Mask all of it's surfaces with tape. 
  2. Use the sharp end of your scissors to puncture two holes on opposite sides of each other at the top of your cardboard tube in order to thread a wire for hanging.
  3. I covered a wire with cotton before looping it through these two holes at the top. (wrapping wire with cotton)
  4. Use the sharp end of your scissors to poke two holes into the side of the tube where you will glue the walnut shells into place. These will become your baby owl's heads. Do not make the holes too big! When gluing in the walnut halves, you want a little resistance from the cardboard tube. These shells should be nestled into the tube with both glue and the firm application of dryer lint surrounding them. Saturate the dryer lint into place under the edges of the nut shells with glue and then let the tube dry over night. You need to make sure that your walnuts are set firmly into the tube before continuing with your process. The tube may take on a warped shape after drying but this will lend a natural appearance to the tree trunk idea.
  5. Cut from extra cardboard a circular shape to fit and seal off the bottom of the tube tree trunk. You can do this by setting the tube on top of a piece of cardboard and drawing around it's circumference with a pencil or pen. Cut the shape out and tape it firmly to the bottom of your tree trunk.
  6. Now apply with white glue and your finger tip, the dryer lint to the opening of the trunk.
  7. Unravel your cotton balls and glue down a first layer of faux, white bark to the remaining sections of the tree trunk. 
  8. Between layers glue in some wrapped areas of black thread and then glue and layer on top of this thread random layers of white cotton. (practice imitating bark for a yule log) This will application is intended to imitate the surface of a sycamore tree. (film of owls nesting in a tree trunk)
  9. Roll cotton between your finger tips to make the eyes and beaks of your owls. Glue these in place and let the faces dry over night. (Practice rolling cotton between your finger tips while crafting peas in the pod.)
  10. Paint the features of the owl eyes and beaks. I used a bit of white paint to complete a few feathery strokes in the crevice of the walnut shells. 
Close up pictures of my owlets in a tree trunk ornament.

Saturday, June 17, 2017

The Sheave of Wheat Chrismon

Above, you can see that I've painted the final
 Chrismon with gold metallic paint but you
could leave it natural looking if you like.
       A description of this Sheave of Wheat Chrismon it at Christian Clip Art Review.
       This faux sheave of wheat is made by first covering the outside of a paper tube with wheat stalks before gluing on the choicest kernals onto it's surface. By doing this you will: stretch your  budget and make the Chrismon lighter weight. 
       Note also that there is a difference between a sheave of wheat symbol and a singular wheat stalk Chrismon in symbolism. Although their meanings are related, these two symbols are not necessarily interchangeable. Many stalks bound together refers to a group of people.

Supply List:
  • hot glue gun and hot glue
  • preserved wheat stalks (pricey, I know)
  • cording to tie the stalk off
  • paper tube
  • masking tape
  • scissors
  • metallic spray paint (optional)
Step-by-step Directions:
  1.  First cut the length of a paper tube and shape it to the thickness you desire your sheave to have. Tape that shape in place. 
  2. Cover the tube entirely with masking tape.
  3. Cut the straw parts of the wheat to cover the tube entirely using hot glue. It isn't necessary to measure these so much; they are easily cut even after applying them to the tube. 
  4. Select the nicest kernels and leaving these attached to an identical straw length to that of your "sheave" tube, proceed to hot glue these to the ornament every 1/4 of an inch around the outside of the tube.You will need far fewer of them to make your Chrismon sheave look full, had you simply bound a giant handful of wheat stalks. This way of making the ornament may be a bit fussy but it allows for the finished product to be considerably lighter weight.
  5. Tie a rough looking cord around the sheave and trim.
  6. Spray paint the Chrismon metallic gold to match the traditional color scheme of a Chrismon tree if you like. I actually prefer the natural gold color.
Left, the cording and preserved wheat stalks for my project. Center, paper towel tubing cut and
masked prior the hot gluing the straw on them. Right a finished Sheave of Wheat Chrismon unpainted.

Friday, June 16, 2017

The Open Bible Chrismon

A simple interpretation of the Open Bible Chrismon.
       This contemporary Chrismon, an Open Bible is described at The Christian Clip Art Review. I used the traditional gold and white Chrismon colors to make this simple Open Bible Ornament.

Supply List:
  • corrugated cardboard
  • masking tape
  • hot glue gun and hot glue sticks
  • metallic gold spray paint
  • gold ribbon
  • white paper
  • stapler
  • printed paper that reads "Holy Bible" and verse from Luke 4:16
  • double stick tape
Directions:
  1. Cut a cover for the Chrismon Bible ornament out of corrugated cardboard. Cover this in masking tape.
  2. Trim off the masking tape.
  3. Bend the book cover in half.
  4. Spray paint this cover with gold metallic paint outdoors. Spray paint inside a cardboard box so that it may be tossed in the recycling bin after use. 
  5. Cut and staple several sheets of white paper that may be fitted between the covers of this Bible Chrismon ornament. Make sure that the printed pages are stapled at the inner-most fold. 
  6. Hot glue these stapled pages between the corrugated cardboard Bible cover after using double stick tape to position the pages open permanently.
  7. Hot glue a long gold ribbon down the center of the pages seam. Make sure the ribbon looped at the top of the book is long enough for the Chrismon to hang easily from the tree.
Far left, cardboard book cover, masked. Next the cover trimmed. Center, paper pages lined up and stapled. Right, pages are taped open with double stick tape.
Karen Barber shares her Chrismon tree with the web.

Monday, June 5, 2017

Craft a Snow House for A Christmas Display!

Crafting snow houses was very popular during the Victorian era. Most antique snow houses are valued for hundreds of dollars; that is why I decided to make my own, of course.
        This snow house began as little shed that was donated to a resale shop for charity. In it's original state it was quite unextraoridinary, dusty and unattractive. I purchased a wooden picket fence at a local hobby store for a few dollars and added a bottle brush tree and wreath. The snow baby was made by gluing a Sculpy face onto a popcycle stick and wrapping a simple gown of snow white cotton batting with white glue. 
       I wrapped the interior walls, roof, base and outside walls with sheets of cotton batting and white glue. The cotton batting icicles where crafted using the method found here.
       The final touch, transparent glitter, gives the finished product a fresh looking layer of ice.
A tiny snow baby lives here along with a lovely bottle brush tree and wreath.
I covered my recycled Christmas house with masking tape prior to wrapping the walls with cotton batting.

Monday, May 22, 2017

Fauve Gingerbread Church Tree Topper

       I have decided to decorate one of my Christmas trees with cotton batting homes and churches. This will be my summer project. Perhaps I will be able to complete enough of these little structures to turn the tree into an entire village? (We shall see, if time permits.) 
       To top off my tree, I recycled a small wooden music box. I payed $3.00 for this charming little church in a resale shop. Often I see discarded items such as this these and wonder how can I transform them into something more appealing? It's seems so wasteful to just toss something with that much detailing on it.
       Although the music box was broken the church still had all of it's green, tinted glass windows intact; plus a very cute, little steeple. It's sturdy wooden form also made it a perfect object to cover with cotton batting. I would not need to reinforce it's walls to prevent the glue from warping the church structure and with the removal of the music box, there should be plenty of room for top tree branches to fit inside!
       So I gave it a try and here is what it looks like now. I think it will make a fine tree topper!

More Fauve Gingerbread for The Christmas Tree:
I purchased a small broken music box at a resale shop. I thought it would need just a bit of sprucing up before topping off one of my Christmas trees with it. Left, this old music box was manufactured in China. Center I removed it's base so that it could be neatly snuggled inside the tree branches of a Christmas tree. Right, here you can see the old music box inside. I removed it to make room for branches.
Left, I prepared the cotton balls by unraveling them. Center, the surface of the church was quite clean, so I began to glue my first layer of cotton batting to it's surface walls. Originally I thought I might paint the roof, steeple, doors and windows. However, I changed my mind quickly as I worked; the little church began to look like gingerbread and I found this very appealing. Right, here you can see the church is almost finished; all it needs now it just a few added touches, a couple of  bottle brush wreaths and a cross at the top of the steeple.
Here is the completed project, I'm very pleased with the results and I can't wait to nestle the
 little fauve gingerbread church at the top of my Christmas tree this year!

Monday, April 10, 2017

"All In The Family" Christmas Retro Gift Tags

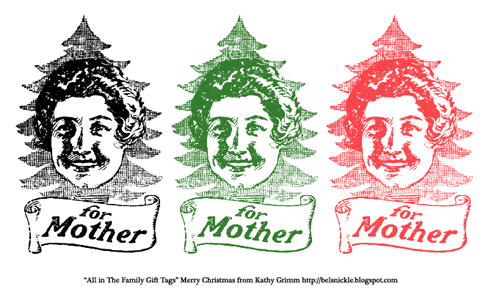
       These Eight Christmas, retro gift tags are redrawn, colorized and made printable by Kathy Grimm. Enjoy crafting your own personal, retro thematic Christmas designs with three color options: black, green and red.

"All In the Family Gift Tags" by Kathy Grimm for Baby.

"All In the Family Gift Tags" by Kathy Grimm for Daughter.

"All In the Family Gift Tags" by Kathy Grimm for Grandpa.
"All In the Family Gift Tags" by Kathy Grimm for Brother.

"All In the Family Gift Tags" by Kathy Grimm for Sister.
"All In the Family Gift Tags" by Kathy Grimm for Mother.
"All In the Family Gift Tags" by Kathy Grimm for Son.
"All In the Family Gift Tags" by Kathy Grimm for Grandma.

Monday, March 13, 2017

Vintage DIY Play Kitchen Stove Top & Oven

Most of the children's furniture in our basement is very old, so I decided that any additions made to our collection should be vintage or antique looking as well.The oven rack on the inside came from an old refrigerator. The copper lobster mold, miniature iron skillet and tin nutmeg cylinder came from a resale shop. The tin log cabin syrup container from my own pantry. The bread is not real, I picked up this pretend loaf in a garage sale.
       The first of several child furnishings I have created using old junk furniture. Because the majority of children's furniture in my collection is either stained and varnished or painted blue, I decided to restore and paint this little kitchen stove top/oven bright red. I have yet to purchase the oven light but I am very pleased with my efforts thus far. I can't wait to fill the top drawer with pots and pans.

The "Elbow Grease"

       I think this heavy duty piece of furniture was intended to be used on a patio? Then someone's teenager painted it black to use in a very tacky bedroom no doubt.
       I purchased it from a resale shop. There was cat hair stuck to the black painted surfaces as well. It cost me six dollars. The cashier could not believe that I was  seriously interested in it! I loved the "Deco" handles, and the wood was sturdy.
       I asked her, "Can you imagine this looking like a play kitchen?" She then took another look at it and agreed that perhaps it could be salvaged with a bit of  elbow grease. I felt very happy with my selection and assured her that it was money well spent for a winter project. I knew that someone small would think so too someday.
       I washed and scrubbed it down and let the little cabinet sit out in the bright sunshine for a week; it had a peculiar odor. Then I sanded off the embedded cat hair. Above you can see that I spent a day spray painting primer on the outside surfaces. One of the drawers was in excellent condition. I kept it for pots and pans. The drawer on the bottom would be converted to a play oven so I removed the sides and back and only kept it's front for the oven door. 
       After removing the handle from the front of my oven door, I repaired the damaged surface with wood filler. The door needed a bit of sanding and silver paint but it was well worth it in the end. I could have put a door with a window in it for my oven. However, decided to keep it simple in the end thinking it would stand up to harsher use and that it would look more old-fashioned like the rest of the Grimm's play furniture.
      I spray painted some of the play cabinet in advance of applying the tiles, thinking it would clean up easier in the end.
       Here you can see that a large cardboard box comes in handy when spray painting outdoors. It keeps the driveway clean of paint and when I am done, all I need to do is crush the box and toss it into the recycling bin. I masked the remaining "Deco" handle before using the bright red paint. I was not yet ready to apply the grey paint to the little kitchen's surfaces.
       I glued white, square tiles to the backsplash of my play oven prior to smearing the surface with black grout. Below you can see the backsplash cleaned up. I thought it would match the iron burners nicely. These burners are actually coasters. The coasters/trivets were not cheap but I felt them so perfect for pretend burners that I splurged and bought them anyway. You can find a wide variety of similar choices all over the internet. My husband used black, flat screws and washers to attach these to the counter top. It was a good thing that I had purchased a cabinet made with solid wood!
       Above you can see that I also purchased unfinished door knobs for the stove and oven temperature knobs. These were later painted black and attached by drilling holes into wooden table top. I used wood glue to attach a small wooden dowel inside each knob and every drilled hole. I wanted the oven built tough enough for a toddler to bang around on it.

More DIY Play Kitchens:

Tuesday, December 20, 2016

Craft Your Own Reproduction Retro Elf Drummer

This little retro drummer was made in 1967.
   Some of you may remember hanging drumming elves on your Christmas tree when you were quite small. You could make these for your own tree now with just a bit of glue and paper.  Don't fidget over getting your own to look just like the one above though. His felt clothing has faded and the paper drum has turned yellow with age. Make your own bright and charming for the next generation to remember.

Pattern pieces for the elf's hat and collar.
Supply List:
  • Paper tube, such as a toilet paper tube
  • scissors
  • decorative paper
  • narrow decorative ribbon
  • holy leaf and berry sequins
  • 1 inch Styrofoam ball
  • a bit of grey felt or any color you like for the hat and sleeves
  • a small piece of white felt for the collar
  • yarn for hair
  • nylon stocking, any flesh color
  • permanent black and red ink marker (felt tip)
  • one chenille stem (matched to nylon stocking in color)
  • white tacky glue
  • light weight cardboard
  • pencil 
  • a razor or craft knife 
  • metallic string for the hanger 
  • pink soft pastel or blush from your makeup kit
  • needle with a large eye
Step-by-Step Instructions:
  1.  Cut 1 1/2 inch section from the paper tube. 
  2. Hold this paper tube against the light weight cardboard and draw around it's circumference. Repeat and cut two of these cardboard circles. 
  3. Use a bit of glue to attach the cardboard circle cut-outs to the bottom and top of the paper drum.
  4. Cut from the decorative sheet of paper a 1 1/2 strip of paper approximately six inches long if you are using a standard size toilet paper roll. This should cover the paper drum neatly. Apply the tacky glue to secure the paper to the paper roll. 
  5. Cut out matching paper circles to cover the top and bottom of the drum.
  6. Paste down a decorative ribbon along the top and bottom edges of the drum.
  7. Tack on the sequin holly leaves and berries.
  8. Cut two inches from your chenille stem for the drummer's arms.
  9. Wrap the chenille stem with a bit of grey felt to create sleeves. Tack this felt down with tacky glue.
  10. Bend the chenille stem to form two arms and glue this piece to the top of the drum.
  11. Cut the 1 inch Styrofoam ball in half with a razor or craft knife.
  12. Wrap and pin a small piece of nylon around one of the Styrofoam balls and pin it down at the back flat side of the Styrofoam head.
  13. Glue a small piece of yarn at the brow of the elf.
  14. Wrap the felt hat piece about the top of the head with some tacky glue. Let it dry
  15. Cut another two inches of felt. Stab the chenille stem through the bottom of the elf's head to act as a neck.
  16. Cut the collar from the white felt.
  17. Stick the other end of the stem through the round collar and cardboard drum top between the arms with a little tacky white glue.
  18. Draw eyebrows, eye lashes on with the black permanent marker.
  19. Draw the lips with a red permanent marker.
  20. Add a bit of blush to his checks with a soft pink pastel or makeup.
  21. Cut the metallic string and thread it through a needle. Sew on the hanger.

DIY Sculpted Shell from Cotton Batting

       This cotton batting sea shell will make a lovely heirloom someday. It has an impressive "cork screw" design.  
      You may choose to finish this project by gluing glitter inside the open cup or just leave the cotton shell unadorned if you prefer.

Supply List:
  • cotton balls
  • masking tape
  • paper egg carton
  • white school glue
  • wire for hanging
  • glitter (optional)
 Step-by-Step Instructions:
  1. Cut and trim shapes from a paper egg carton. You can glue and tape these shapes into paper shells.
  2. Cover the sea shell shape entirely with masking tape.
  3. Decide in advance, where you want the hook for hanging the ornament will be and tape a wire loop down to the masked form. Add glue to the tape to make the bond more secure. This wire will get buried underneath a few layers of cotton but you can find it again with a fine needle when you are ready to add a fine wire or thread for hanging.
  4. Unravel a fist-full of cotton balls.
  5. cover the surfaces with white glue; spread this with a fingertip.
  6. Layer the cotton strips on top of the glued surface and press gently.
  7. Let this first application dry a bit and repeat the process.
  8. Now roll some of the cotton strips into long "snake like" shapes. 
  9. Squeeze the white glue out into a spiral trail around the faux sea shell. 
  10. Now twist and apply the cotton rolls into the glue.
  11. Let this dry and then apply another layer of white glue, smoothing down the surface with your fingertip as you go.
  12. Apply more cotton to the raised areas again and repeat the the glue layers until you are satisfied with the results.
  13. Twist cotton and white glue around the wire for hanging and push it through a hook embedded inside the cotton.
Masked shapes made from recycled paper egg cartons.
Drawings of California Sea Shells. Print and look at while
designing your own cotton batting sea shell crafts.

Silver and Gold Tinsel Icicles

   These fun homemade icicles are so easy to make, even a child would enjoy the process. Of course, I can't guarantee they won't poke each other with the skewers while they craft these; so parents, watch them closely to make sure your kids behave!  
A silver and gold tinsel icicles hanging on my
white Christmas tree.

Supply List:
  • wooden skewers or toothpicks
  • wire for hanging
  • aluminum tape
  • decorative gold wire with stars
  • aluminum foil 
  • masking tape
Step-by-Step Instructions:
  1. Cut or break your wooden skewers to the lengths you prefer for icicles. I choose to make my versions 6 inches in length.
  2. Bend your wire in half and attach it with masking tape to the top of the icicle.
  3. Crush a bit of aluminum foil to the upper part of the icicle in order to wrap it into a tapered shape.
  4. Cut the aluminum tape into stripes and twist these down the skewer, overlapping the tape a bit. Cover the entire skewer with the aluminum tape.
  5. Cut and twist the gold wire around the silver tinsel icicle.
  6. Add a hanger.
Step-by-Step wrapping process for tinsel icicle.
Safer Tin Crafts for Young Kids:

Monday, December 19, 2016

Clip Art of Old-Fashioned Sleds

Description of Illustration: wooden sleds drawn by Kathy Grimm, boards, hand-built, for sledding


Have a question about the illustration? Just type it in the comment box and I'll get back to you as soon as possible. I only publish content that is closely related to the subject, folks.

Sunday, December 18, 2016

A Cool Balancing Act Ornament Craft

Left, the snowman before his features are glued on and painted. Right, the finished result.
       This little snowman balances snowballs and one tiny red bird on his arms and hat. He has faux black coal bits for eyes and buttons and a bright orange carrot for a nose. He's a jolly cute addition for any Christmas tree this holiday season.

Supply List:
  • Q-tips
  • white cotton balls
  • white school glue
  • paper egg carton
  • acrylic paints: orange, green, red and black
  • masking tape
  • newsprint
  • wire for the hanger
  • scissors
  • transparent glitter
Step-by-Step Instructions:
  1. crush three balls from the newsprint and cover these with masking tape. 
  2. Tape the snowball body parts together.
  3. Poke holes where ever you would like his arms to be with the tip of your scissors.
  4. Squeeze a generous portion of white glue into these holes and press the Q-tip arms inside the cavities. Let the body dry.
  5. Unravel a generous portion of white cotton balls.
  6. Apply white glue to the masked surfaces of your snow persons body and wrap the cotton around the form excluding the O-tip arms. 
  7. Apply maybe three to four layers of cotton batting always layering it with white glue. 
  8. Cut a little paper cap from the egg carton and glue this to the top of his head.
  9. shape a carrot nose, coal eyes and buttons, plus snowballs and a small bird from the cotton batting. Ad small amounts to the batting as you do this and let these tiny parts dry.
  10. Glue on the miniature features and let the snowman dry thoroughly before painting him.
  11. Paint his features using fast drying paints.
  12. Apply one last coat of white glue to his body and sprinkle on top some transparent glitter.
My snowman is finished and hangs on the Christmas tree
 branch very careful not to drop and single snowball.

Recycle vintage crochet for the tree...

Believe it or not this vintage crochet craft was made to decorate cutlery. No,
really, I mean yes. Well I haven't acquired a doll for it yet so I guess I'll just
hang it on the tree. I made the wire hanger anyway.

    What once was used to decorate flatware with is now destined for the Christmas tree! This craft when not used for dolls really doesn't make since. So, I twisted a miniature hanger from scrap wire and hung it on a Christmas tree. There it may be appreciated, at least until I knit a doll that needs dressing.

Friday, December 16, 2016

I've Restored A Few Angelic Postcards...

      I've restored a few angelic postcards from Germany. These were once antiques but they've been made new again. Print them out for crafts and nostalgic Christmas cards/letters. Go here to see more  angel clip art at The Christian Clip Art Review.

This angel carries a Christmas tree on a cloud above a quite church in the snow.
Here is an Angel with an evergreen, surrounded by cherubim, clouds and stars.
This angel stands next to a decorated tree with lighted candles, apples and gingerbread.
A little angel rides on the back of a deer through the woods and points to the peaceful village below a starry sky.
This tall angel spreads her wings to reveal the wise kings searching the night sky for a star.

Have a question about the illustration? Just type it in the comment box and I'll get back to you as soon as possible. I only publish content that is closely related to the subject, folks.

More Christmas Angel Clip Art: