Monday, December 19, 2016

Clip Art of Old-Fashioned Sleds

Description of Illustration: wooden sleds drawn by Kathy Grimm, boards, hand-built, for sledding, Victorian scrap of a young boy in red with holly on his sled.


Have a question about the illustration? Just type it in the comment box and I'll get back to you as soon as possible. I only publish content that is closely related to the subject, folks.
 
 
Victorian die cut of a small boy on a sled

Sunday, December 18, 2016

A Cool Balancing Act Ornament Craft

Left, the snowman before his features are glued on and painted. Right, the finished result.
       This little snowman balances snowballs and one tiny red bird on his arms and hat. He has faux black coal bits for eyes and buttons and a bright orange carrot for a nose. He's a jolly cute addition for any Christmas tree this holiday season.

Supply List:
  • Q-tips
  • white cotton balls
  • white school glue
  • paper egg carton
  • acrylic paints: orange, green, red and black
  • masking tape
  • newsprint
  • wire for the hanger
  • scissors
  • transparent glitter
Step-by-Step Instructions:
  1. crush three balls from the newsprint and cover these with masking tape. 
  2. Tape the snowball body parts together.
  3. Poke holes where ever you would like his arms to be with the tip of your scissors.
  4. Squeeze a generous portion of white glue into these holes and press the Q-tip arms inside the cavities. Let the body dry.
  5. Unravel a generous portion of white cotton balls.
  6. Apply white glue to the masked surfaces of your snow persons body and wrap the cotton around the form excluding the O-tip arms. 
  7. Apply maybe three to four layers of cotton batting always layering it with white glue. 
  8. Cut a little paper cap from the egg carton and glue this to the top of his head.
  9. shape a carrot nose, coal eyes and buttons, plus snowballs and a small bird from the cotton batting. Ad small amounts to the batting as you do this and let these tiny parts dry.
  10. Glue on the miniature features and let the snowman dry thoroughly before painting him.
  11. Paint his features using fast drying paints.
  12. Apply one last coat of white glue to his body and sprinkle on top some transparent glitter.
My snowman is finished and hangs on the Christmas tree
 branch very careful not to drop and single snowball.

Recycle vintage crochet for the tree...

Believe it or not this vintage crochet craft was made to decorate cutlery. No,
really, I mean yes. Well I haven't acquired a doll for it yet so I guess I'll just
hang it on the tree. I made the wire hanger anyway.

    What once was used to decorate flatware with is now destined for the Christmas tree! This craft when not used for dolls really doesn't make since. So, I twisted a miniature hanger from scrap wire and hung it on a Christmas tree. There it may be appreciated, at least until I knit a doll that needs dressing.

Friday, December 16, 2016

I've Restored A Few Angelic Postcards...

      I've restored a few angelic postcards from Germany. These were once antiques but they've been made new again. Print them out for crafts and nostalgic Christmas cards/letters. Go here to see more  angel clip art at The Christian Clip Art Review.

This angel carries a Christmas tree on a cloud above a quite church in the snow.
Here is an Angel with an evergreen, surrounded by cherubim, clouds and stars.
This angel stands next to a decorated tree with lighted candles, apples and gingerbread.
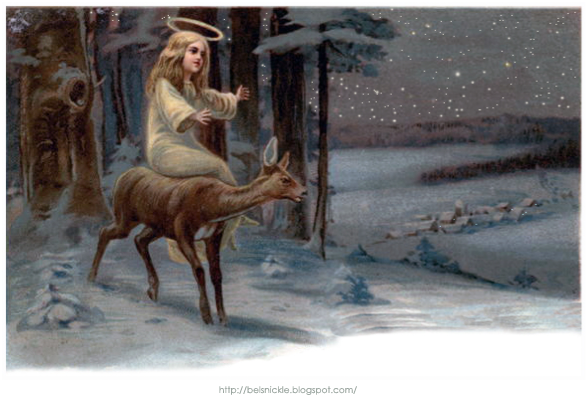
A little angel rides on the back of a deer through the woods and points to the peaceful village below a starry sky.
This tall angel spreads her wings to reveal the wise kings searching the night sky for a star.

Have a question about the illustration? Just type it in the comment box and I'll get back to you as soon as possible. I only publish content that is closely related to the subject, folks.

More Christmas Angel Clip Art:

Tuesday, December 13, 2016

A Fine Feathered Bird Ornament

       This feathered, pudgy bird would sit perfectly on a pine bough or hang easily from the most delicate branches of a fir tree, for it is as light as a feather! I chose to use undyed feathers in a variety of browns for my project because I have a woodland themed ornament collection. However, this little bird would look just as sweet with brightly colored feathers in blues, reds, or yellows sitting inside of a white Christmas tree or hanging from a fragile twig tree if you prefer.

Supply List:
  • hot glue and hot glue gun
  • paper mache pulp or a bit of air dry paper clay
  • one styrofoam ball
  • a bag of feathers (your choice in color and texture)
  • acrylic paints ( I used black, white, grey and yellow)
  • an ordinary pencil
  • white tacky glue as well 
  • scrap tissue paper
  • masking tape
  • wire for hanging
Step-by-Step Instructions:
  1.  Crumple the tissue and form a second "half" ball on top of the styrofoam ball. Tape this down with masking tape, covering all of the tissue paper with the masking tape.
  2. With either paper mache pulp (water added according to directions on the wrapper) or with air dry paper clay, shape the eyeballs, eyelids and beak and attach to the masked head with hot glue. 
  3. Take your sharpened pencil and push into the lower styrofoam ball approximately half an inch and remove it from the tail area of the bird. 
  4. Now fill this cavity with white glue, plus the feathers that you have selected for the tail of your bird. Prop this tailside up against a couple of books on a table and let it dry for a while to keep the glue from running.
  5. Now layer and glue feathers to the lower half of the bird's body.
  6. Paint the eyes and beak of the bird using acrylic paints and let the painted clay or mache parts dry. If you use paper mache for these features, you will need to wait for them to dry solid before painting them.
  7. Glue the head feathers of the bird on last, smoothing them down a bit with white glue away from the eyes and beak.
  8. Push a wire into the head of your bird along with a bit of white glue, to create a loop for hanging it from the tree. 
More links to bird crafts:

Beaded Pearl Icicles

I made eleven pearl icicles from left over beads.
       As usual, I spend a bit of time going through old craft supplies in December, trying to organize them in some new fashion. However, this is somewhat useless because I have far too much stuff! 
       I did find a old bag of lovely faux pearls. These appeared to be vintage; perhaps I salvaged them from some garage sale somewhere, who knows? There weren't really enough of them to start something big so I recycled these into a handful of beaded pearl icicles for my Victorian themed tree.

Supply List:
  • pearl beads, a large variety of sizes
  • wire or long ornament hooks
  • cotton batting 
  • white glue
  • needle-nose jewelry pliers
Step-by-Step Instructions:
  1.  I used long ornament hooks for this ornament craft so all that I needed to do was straighten my wires out before starting. However, if you are measuring out your wire for beaded pearl icicles you may wish to do a bit of experimenting at first with the lengths. These may be as long or short as you like. The larger your tree the longer the icicles need to be in order for them to display nicely on the branches. I decided to use four and a half inch wires to string my beads on for a five foot tall tree.
  2. Unravel a few cotton balls and set these aside.
  3. Apply white glue to approximately an inch to an inch and a half length of the wire starting from the end. 
  4. Twist, "wrap", a small bit of cotton batting around the length of the wire where you have applied the white glue. 
  5. Now gingerly shape this end of the wire into a hook.
  6. Bead your faux pearls onto the opposite end of the wire; selecting first, the largest bead and then the next largest and so on. 
  7. After stringing your beads thus, take the needle-nose jewelry pliers and bend a loop at the tip of the icicle to prevent the beads from falling off the wire.
More links to icicle crafts:

Sunday, December 4, 2016

Color This Guardian Angel for Christmas

 
       I've restored this coloring page by Walter Crane for your Christmas coloring fun. You may download more restored pages by this famous illustrator at The Crayon Palace.
       I will be restoring and maintaining a collection by Crane on my children's coloring blog for the following year. 

 
 The Winter Brook by Marian Willard

Do you dream, little brook, in the long night,
'Neath your blanket of soft white snow?
Do you dream of the light of the sunshine bright,
When the nodding daisies grow?

Do you dream as you sleep 'neath the winter stars,
That the snow-drifts that o'er you sweep,
Are the spirits of flowers from the summer hours
That a guard and a watch will keep?

More Christmas Angels To Color: