Thursday, November 13, 2014

Wrap a Pipe-Cleaner Wreath Ornament

My finished pipe-cleaner wreath ornament.
Supply List:
  • tiny red pom poms
  • Green chenille stems (pipe cleaners)
  • a hexagonal pattern
  • cardboard
  • scratch paper
  • pencil
  • scissors
  • white glue
  • green ribbon
Step-by-Step Directions:
  1. Cut a hexagon from a then piece of sturdy cardboard. Use a pencil to draw a smaller hexagon on the inside of the shape in the exact center of the cardboard. 
  2. Cut out the smaller interior hexagon carefully.
  3. Now carefully wrap green chenille stems around the cardboard shaped wreath. You may choose to use a little white glue to help the chenille adhere to the cardboard surface as you work.
  4. Let the wreath dry. 
  5. Glue on tiny red pom poms to both sides.
  6. Tie on a lovely green silk ribbon to hang your ornament on the tree.
Hexagonal shaped wreath ornament. Left, paper template. Center, cardboard cut-out. Right, shape wrapped in chenille stems.
More Chenille Stem Wreath Ornaments:

Christmas Penny Peppermint Ornaments

      I used left over scrap wool for this Christmas ornament project. Little girls used to practice their sewing skills making decorative penny rugs during the mid 1800s for their homes. These little "rugs" as they called them were used to protect the surfaces of trunks, tables and dressers from scratches. 
      Traditional penny rugs use only round wool felt clippings for their designs but modern crafters often incorporate these simple shapes with more complicated motifs in their rug designs.
      I made these penny peppermints using two stitches: the straight stitch and a blanket stitch. However, you may use the embroidery stitches that you prefer to make similar versions.

Supply List:
  • red and white threads
  • red and white wool scraps
  • circle template or coins to trace around
  • plastic sandwich bags
  • white glue
  • wire hooks for hanging
  • scissors
  • needle
Step-by-Step Instructions:
  1. Draw circular shapes to layer on top of each other by tracing around objects like coins or use a circle template if you like.
  2. Then alternate red and white penny shaped wool scraps to suggest peppermint candies.
  3. Knot the red thread and work from the back to the front all around the wool felt shapes.Sew using a straight stitch the first four layers of penny shapes together.
  4. Then blanket stitch the fourth layer on top of the fifth using white thread.
  5. Cut two more white felt circles to sandwich between two identical finished penny peppermints to give the wool candies thickness. Blanket stitch around the outside of these layers with red thread.
  6. Cut the sandwich bags into rectangles. Wrap the wool peppermints by twisting either end together just like real peppermint candies are packaged. I wound white thread and added a bit of white glue to the threads in order to hold the plastic in place.
  7. Twist on a wire hook at one end to hang your wool peppermint candies on the tree.
Left, Steps for layering the peppermint penny ornaments. Right the finished result before wrapping these in plastic candy wrappers.
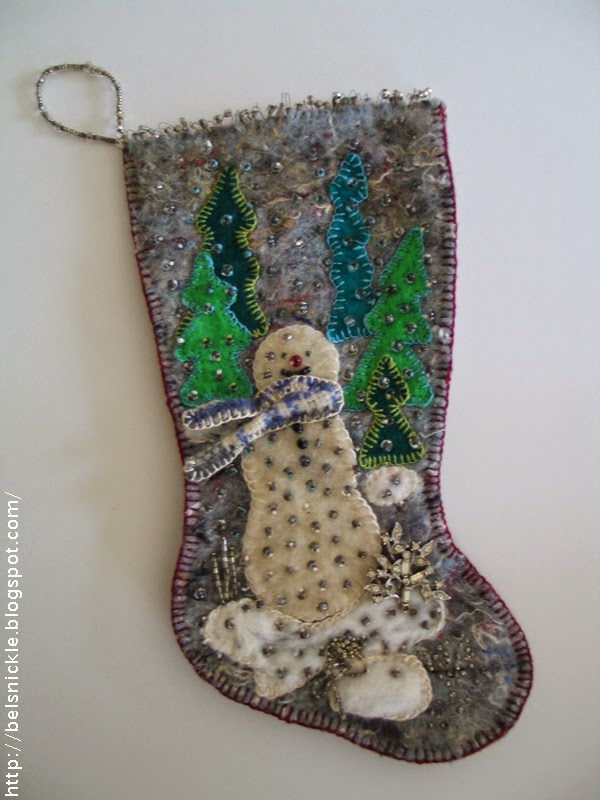
Penny rug sample
      In the 1800s, starting around the time of the Civil War, thrifty homemakers would use scraps of wool or felted wool from old clothing, blankets and hats to create designs for mats or rugs. Using coins as templates, they created circles and each piece was then stitched in blanket stitch fashion. (Thus, the name "penny" rug). Sometimes, the mats or rugs were backed with old burlap bags or feed sacks. Sometimes a penny was stitched inside the mat to make it lie flat.
      Penny rugs are not actual rugs for the floor, but decorative coverings for beds, tables and dressers and mantles. Sometimes they are used as wall hangings or pillows. Most designs include circles and some include images from everyday life such as cats, flowers, birds and shapes such as stars and hearts.
       Penny rugs are made by selecting good quality 100% wool. It must not be too thick. It may be hand-dyed or overdyed to give the piece dimension. The wool is felted then circles are cut from the wool in varying sizes and then stitched together concentrically using complementary colors. The circles are stitched to a wool backing in a pleasing design. When finished the entire piece should have a backing to cover the stitches and to protect it. The backing may be wool, linen or burlap.

More Penny Rug Inspired Christmas Ornaments:

Craft a Cotton Batting, Birch Yule Log Ornament

The front and back views of my Birch Yule Log Christmas ornament.
Birch trees click to read more about this species.
Supply List:
  • two toilet paper rolls
  • scissors
  • white school glue
  • grey dryer lint
  • white cotton balls
  • black thread
  • holly and berry trims
  • tiny mushroom bird
  • masking tape
  • cotton covered wire
Step-by-Step Directions:
  1.  Cut and shape the two toilet paper rolls or any paper tubes to resemble a cut log. I choose to make this birch log shape a little narrower than the original circumference of an average toilet paper roll. I cut my two rolls length wise and curled them tighter before masking them with tape. 
  2. I cut down the size of one of the rolls and added a bit of glue to it's edge, then used masking tape to firmly attach the appendage to one end of my log.
  3. Mask the entire form with tape before gluing on the dryer lint and cotton batting.
  4. Unravel your cotton balls several at a time so that you can work quickly.
  5. Apply white glue to sections of the log's surface as you layer the lint and cotton onto the cardboard tubes. 
  6. Give your Yule log time to dry between applications. I also layered dryer lint on the end interior surfaces of my log. I left parts of the log open however, in order to insert a letter or small money gift into the ornament later.
  7. Once the log looks the way you wish it to, wrap black thread around it randomly to enhance the total realistic look of Birch bark. 
  8. Use the tip of your scissors to poke a hole in either end of your finished log and insert a cotton covered wire to shape a handle for the ornament. 
  9. I also wrapped a few vintage wired holly leaves/berries around this handle.
  10. Glue on a little prefabricated mushroom bird to the top of your Yule log ornament too.
  11. Now add a final thin coat of white glue to the finished piece and you are finished.
A few odd angles of the Yule log.
More About Yule Logs:

Monday, November 10, 2014

Kids Can Cut and Paste A Heart-Shaped Christmas Tree

Left, finished Christmas tree. Center, backside of construction paper tree. See the different colors of tissue paper pasted over each hole. Right, the finished heart-shaped, Christmas tree craft.
      Here is a simple little Christmas craft that any young child may enjoy making on a snowy Winter's day. You will need the following supplies: colored tissue papers, brown and green construction paper, scissors, white glue and round objects to use as stencils. 
      Cut out one very large heart from dark green construction paper. Turn this upside down and glue a large brown square to the backside of the heart leaving a few inches of it showing beneath the heart to represent the tree's trunk. Then cut a slightly smaller heart using a lighter shade of green construction paper and glue this on top of the larger heart shape. Continue cutting and gluing additional hearts in the same fashion. Look above at the photos to see the placement of these heart shapes. 
      Next use round objects or stencils to trace Christmas baubles on top of each section of your construction paper tree. Poke through each circle with the point of a pair of scissors and carefully cut away the circular shapes. Turn your Christmas tree over to it's backside and then paste small squares of tissue to cover each hole entirely. Let the surface dry.
      Now you are ready to hang your decorated, construction paper tree on to any window. The light shining through each circular shape will look like stained glass.

More Tissue Paper Christmas Tree Crafts:

Friday, November 7, 2014

Enhance a Christmas Stocking With Costume Jewelry

 I used a grey felt, silver and crystal seed beads and a simple
 scene depicting a snowman to create this small stocking that
 now hangs on my youngest child's Christmas tree every year.
      When my mother-in-law passed away many years ago, I was given a few pieces of her costume jewelry. I did not frequently wear rhinestones nor did my little ones at that time, for they were quite young.
      I did, however, have a mind to use these vintage pins in some way so that my children could have some sentimental memory associated with them. So I incorporated this glittery costume jewelry into a couple of beaded Christmas stockings. Then I gifted these to my girls on the Christmas following their grandmother's death.
      Now every year I see these charming little socks hanging on their trees and think of her. She would have liked for her granddaughter's to remember her most at Christmas, for she was quite the Christmas fanatic herself. It was one of the happiest common interests that we shared together before her passing.
      The pins can also be removed for wearing should my daughters care to use them for that purpose some day.
      I will also post photos of my older girl's version as soon as she unpacks her ornaments for the season.
My appliqued snowman is made from white wool and he
sports a wooly scrap scarf as well.
Photographed here is one of the little rhinestone twig pins
that once belonged to my mother-in-law.
I finished the top edge of these stockings with wire and glass
seed beads. The sides of the stockings are finished with
embroidery floss using the blanket stitch.

Sculpt Miniature Cotton Batting Pumpkin Ornaments

      You don't need much money to craft Thanksgiving heirloom treasures from recycled egg cartons and cotton batting. All it takes is a bit of imagination, glue and confidence to shape and paste cotton batting pumpkins like these.  My miniature pumpkin ornaments are also hollow so that I can include a small token, scripture or money gift inside of each of them for my guests and family members.
      From October through November I decorate my Blessing Tree with small delicate ornaments like these little cotton batting pumpkins.  

Left, a finished cotton batting pumpkin. It's hollow so that I may add a message.
Right, Here you can see it hanging from a very delicate branch. Cotton batting
ornaments are very light weight!
Supply List:
  • egg cartons
  • white cotton balls
  • white school glue
  • thin wire
  • scissors
  • pencil
  • acrylic paints: red, orange, yellow, white, gold and green

Step-by-Step Instructions:
  1. Cut dome shapes from paper egg cartons to use in this Thanksgiving Tree craft. You will need two dome shapes per pumpkin.
  2. Glue the two halves together to shape a round pumpkin. Use tacky glue for this process and also add a bit of white cotton around the seam to give it strength. Brush the surface again with white glue and then let these forms dry over night. 
  3. Cut out a shape at the top of each pumpkin with a small pair of very sharp scissors. I cut out a cross shape at the top of my pumpkins.
  4. Now you will need to roll in the palms of your hands some log-like shapes from your cotton batting in order to form the ribs of your pumpkins. Pinch down on either side of the log shapes  to taper off the ribs at both the top and the bottom of the pumpkin. Glue these to the sides of your egg carton shapes. Let them dry.
  5. Now brush on a layer of white glue and let this dry.
  6. Pull of more cotton from your cotton balls and gently add this with another coat of glue to the surface of your pumpkin in order to shape a final layer of the batting. Let this dry.
  7. Add a final coat of white glue and stick a pencil into the bottom half of your pumpkin. Pushing and twisting gently in order to give the pumpkin a more organic shape. 
  8. Glue a whole clove into this indention and let the pumpkin dry. 
  9. Now you may paint the surface of your pumpkin using gold, orange and red acrylic paints. I mix these together roughly while applying paint to the surface of my ornament. Paint the crevices with darker shades and the ribs with lighter ones.
  10. Take your sharp scissor points and make two small hole on either side of the opening at the top of the pumpkin.
  11. Insert a cotton coated wire and shape a handle. Paint this handle green to mimic a "vine."
  12. I will insert a scripture in each of my hollow pumpkins for every guest I treat this year. I've listed a few popular blessing scriptures below.
Egg cartons make excellent craft material.
Left, I've cut out the cup shapes of an egg carton in order to shape my miniature pumpkins. Middle, Glue two of the egg cups together to form a hollow pumpkin shell. Cut a hole at the top so that you can insert a little treat, gift or message inside the pumpkin shell. Right, Glue a thin layer of cotton batting around the seam to conceal it and make your ornament stronger.
In these photos you can see how I shaped the cotton batting to form an organic looking pumpkin. A small clove is glued to the bottom of each miniature shell where the blossom end would normally be on a real pumpkin.
Here I have added handles to each pumpkin so that these may be hung from my Blessing Tree.
I used acrylic paints to color these old fashioned, hand sculpted ornaments.
Just a Few Blessing Scriptures to Include Inside The Pumpkin Ornaments: NIV versions
  • Do not repay evil with evil or insult with insult. On the contrary, repay evil with blessing, because to this you were called so that you may inherit a blessing. 1 Peter 3:9
  • Blessed are the peacemakers, for they will be called children of God. Matthew 5:9
  • Whoever gives heed to instruction prospers, and blessed is the one who trusts in the Lord. Proverbs: 16:20
  • A good man brings good things out of the good stored up in his heart, and an evil man brings evil things out of the evil stored up in his heart. For the mouth speaks what the heart is full of. Luke 6:45
  • Blessed are those who hunger and thirst for righteousness, for they will be filled. Matthew 5:6
  • But to you who are listening I say: Love your enemies, do good to those who hate you, bless those who curse you, pray for those who mistreat you. Luke 6:27-28
  • Taste and see that the Lord is good; blessed is the one who takes refuge in him. Psalms 34:8
  • Worship the Lord your God, and his blessing will be on your food and water. I will take away sickness from among you. Exodus 23:25
More Pumpkin Crafts for Your Thanksgiving Table:

Thursday, November 6, 2014

Crafting With Driftwood for Christmas

      When my kids were very young, my husband and I lived in San Francisco. On weekends we would go to the beach for long walks and then splurge on a few hot ciders at a local market in Half Moon Bay. Occasionally I would find an interesting piece of driftwood on the beach and if it was small enough, I'd take it home and make good use of it. 
      One Christmas I painted a small piece of driftwood like a Belznickle and wrapped it up for my husband. Although it was a strange ornament it didn't look out of place on our tree, which was decked out entirely with Belznickes. 
      My younger child absconded it for her own collected memories and she now hangs him on her tree every year.
Driftwood is wood that has been washed onto a shore or beach of a sea, lake, or river by the action of winds, tides or waves. It is a form of marine debris or tidewrack. Above you can view the front, up close and back of my hand painted driftwood Santa.
More Driftwood Ornaments:
      "A fun DIY video, how to build a driftwood Christmas tree . . I will post the full step by step tutorial on my blog (tomorrow Dec 16th) with more details and a link to buying the tree we made for this video. visit, http:// debisdesigndiary.com..If you enjoyed this video subscribe to my youtube channel for more DIY tutorials, I post new videos regularly to youtube! You can also find me on Facebook Facebook.com/debisdesigndiary" Here is the video DIY of the cute beach ball ornament Debi made.